Create Terrain RGB tile from DEM
In this section, we are going to develop terrain RGB raster tileset from your own DEM.
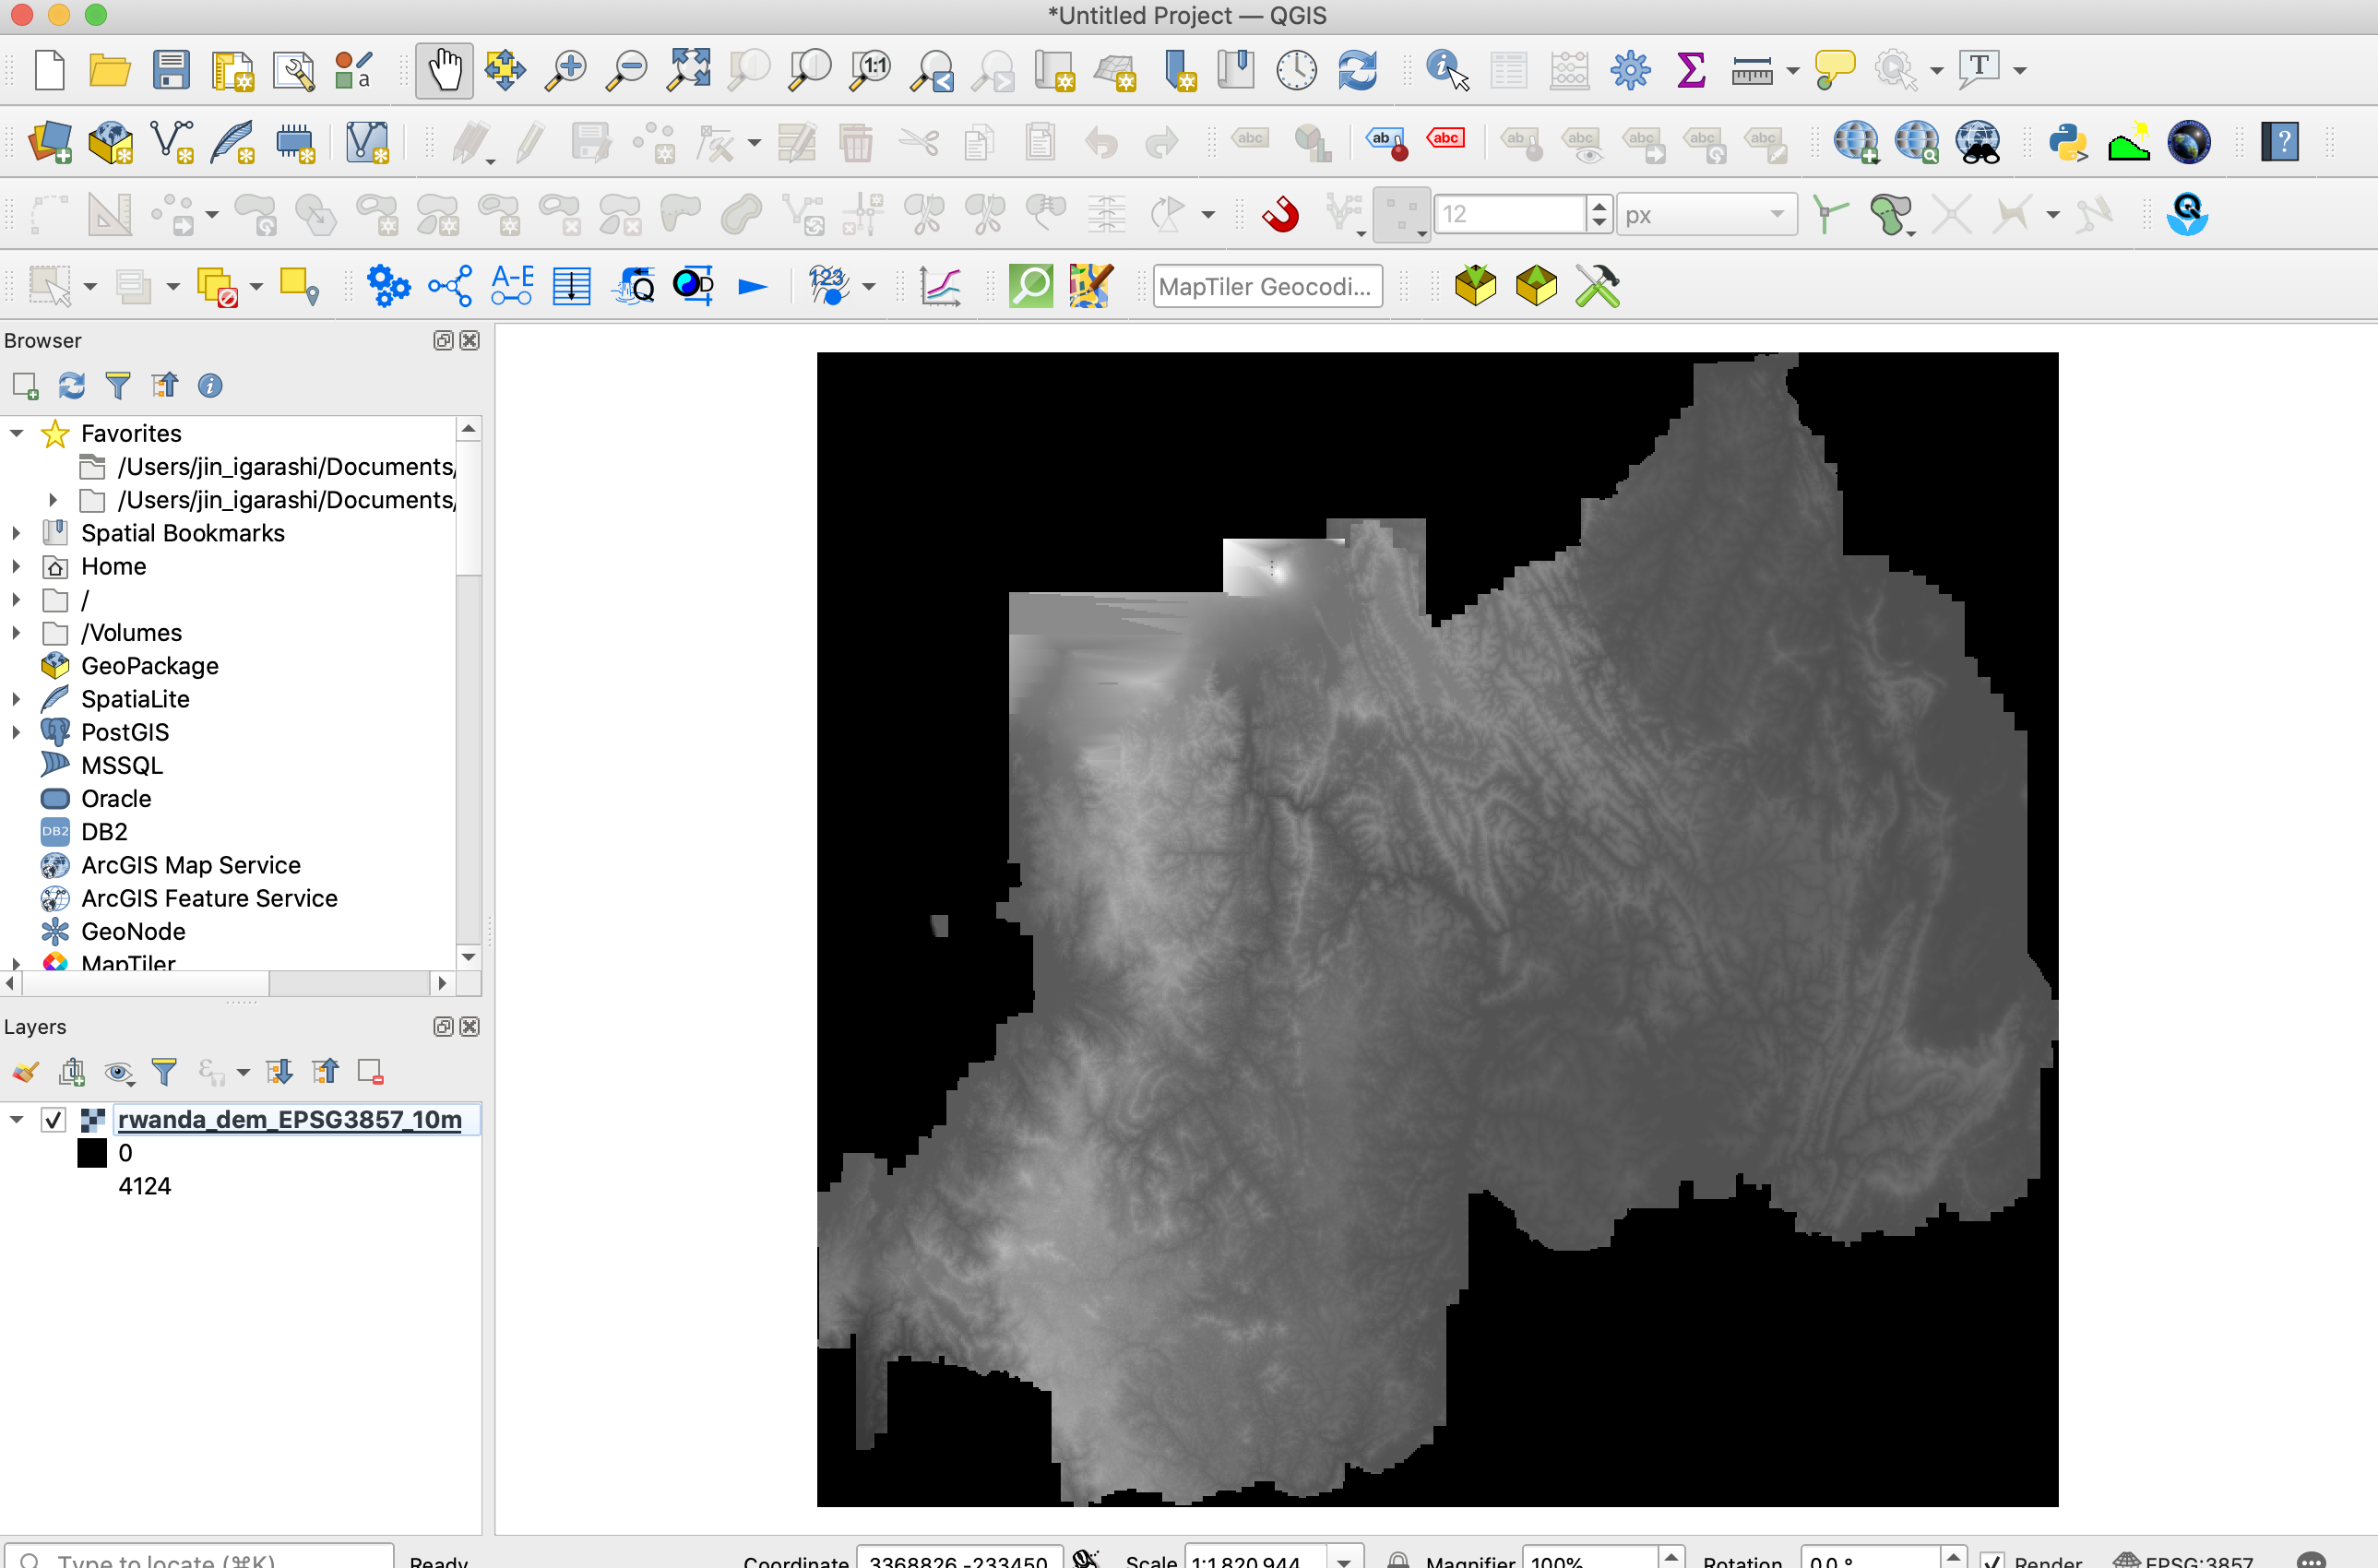
Here, we will use 10m DEM which is owned by WASAC in Rwanda as an example. The below is a sample image of Rwanda DEM on QGIS.
1. Trasform projection of DEM to EPSG:3857
First, you must transform the projection of your DEM to Web Mercator (EPSG:3857) by using QGIS or GDAL tool.
2. Setup dem2terrainrgb tool in your computer
For converting your DEM to terrain RGB raster tile, you must use several commands as follows.
- Resetting the value for No Data
- RGB-ify DEM data
- Create raster tilsets
But I already develop a simple pythion script to create terrain RGB tile from DEM. Before installing this tool, please make sure you have installed Python3.9 and GDAL3.2.0 in your machine.
For installation, you just do the below commands.
git clone https://github.com/watergis/dem2terrainrgb.git
cd dem2terrainrgb
pipenv install
Put your DEM under data folder.
mkdir data
mv ~/rwanda_dem_EPSG3857_10m.tif data/.
3. Create Terrain RGB raster tilesets
Now, we run the tool to convert DEM to tilesets.
pipenv shell
python main.py --dem ./data/rwanda_dem_EPSG3857_10m.tif --dist ./tiles
Terrain RGB raster tilesets are normally generated between zoom level 5 and 15. So this process might take a bit time to complete.
filled NODATA value successfully: ./tmp/rwanda_dem_EPSG3857_10m_without_nodata.tif
rgbified successfully: ./tmp/rwanda_dem_EPSG3857_10m_RGB.tif
created tileset successfully: ./tiles
After processing, raster tilesets will be generated under tiles folder.
However, we need to delete all of unnecessary “*.xml” files as the below command before going to next step.
find ./tiles -name "*.xml" -exec bash -c 'rm "$1"' - '{}' \;
4. Check terrain RGB raster tilesets
All of tiles will be created under tiles folder.
GDAL2tiles generated some example source code for leaflet and openlayers. You may double-click openlayers.html to check it on your browser.

5. Validate processed file
This tool will generated 2 tiff image under tmp folder. First, we can validate these files.
- validate
rwanda_dem_EPSG3857_10m_without_nodata.tif
This geotiff image was filled value instead of No Data.
$ rio info --indent 2 ./tmp/rwanda_dem_EPSG3857_10m_without_nodata.tif
{
  "blockxsize": 256,
  "blockysize": 256,
  "bounds": [
    3223733.0877,
    -316437.17616185057,
    3439718.7685284764,
    -115768.6321
  ],
  "colorinterp": [
    "gray"
  ],
  "compress": "deflate",
  "count": 1,
  "crs": "EPSG:3857",
  "descriptions": [
    null
  ],
  "driver": "GTiff",
  "dtype": "uint16",
  "height": 19992,
  "indexes": [
    1
  ],
  "interleave": "band",
  "lnglat": [
    29.92940323722318,
    -1.9409140983431143
  ],
  "mask_flags": [
    [
      "all_valid"
    ]
  ],
  "nodata": null,
  "res": [
    10.037442179964515,
    10.037442179964515
  ],
  "shape": [
    19992,
    21518
  ],
  "tiled": true,
  "transform": [
    10.037442179964515,
    0.0,
    3223733.0877,
    0.0,
    -10.037442179964515,
    -115768.6321,
    0.0,
    0.0,
    1.0
  ],
  "units": [
    null
  ],
  "width": 21518
}
- validate
rwanda_dem_EPSG3857_10m_RGB.tif
This geotiff image was already rgb-ified by raster io module. You can check by the below command.
$ rio info --indent 2 ./tmp/rwanda_dem_EPSG3857_10m_RGB.tif
We can see now there is 3 bands color.
{
  "blockxsize": 256,
  "blockysize": 256,
  "bounds": [
    3223733.0877,
    -316437.17616185057,
    3439718.7685284764,
    -115768.6321
  ],
  "colorinterp": [
    "red",
    "green",
    "blue"
  ],
  "compress": "deflate",
  "count": 3,
  "crs": "EPSG:3857",
  "descriptions": [
    null,
    null,
    null
  ],
  "driver": "GTiff",
  "dtype": "uint8",
  "height": 19992,
  "indexes": [
    1,
    2,
    3
  ],
  "interleave": "band",
  "lnglat": [
    29.92940323722318,
    -1.9409140983431143
  ],
  "mask_flags": [
    [
      "all_valid"
    ],
    [
      "all_valid"
    ],
    [
      "all_valid"
    ]
  ],
  "nodata": null,
  "res": [
    10.037442179964515,
    10.037442179964515
  ],
  "shape": [
    19992,
    21518
  ],
  "tiled": true,
  "transform": [
    10.037442179964515,
    0.0,
    3223733.0877,
    0.0,
    -10.037442179964515,
    -115768.6321,
    0.0,
    0.0,
    1.0
  ],
  "units": [
    null,
    null,
    null
  ],
  "width": 21518
}
If you add rgbified geotiff on QGIS, the image should be as below.
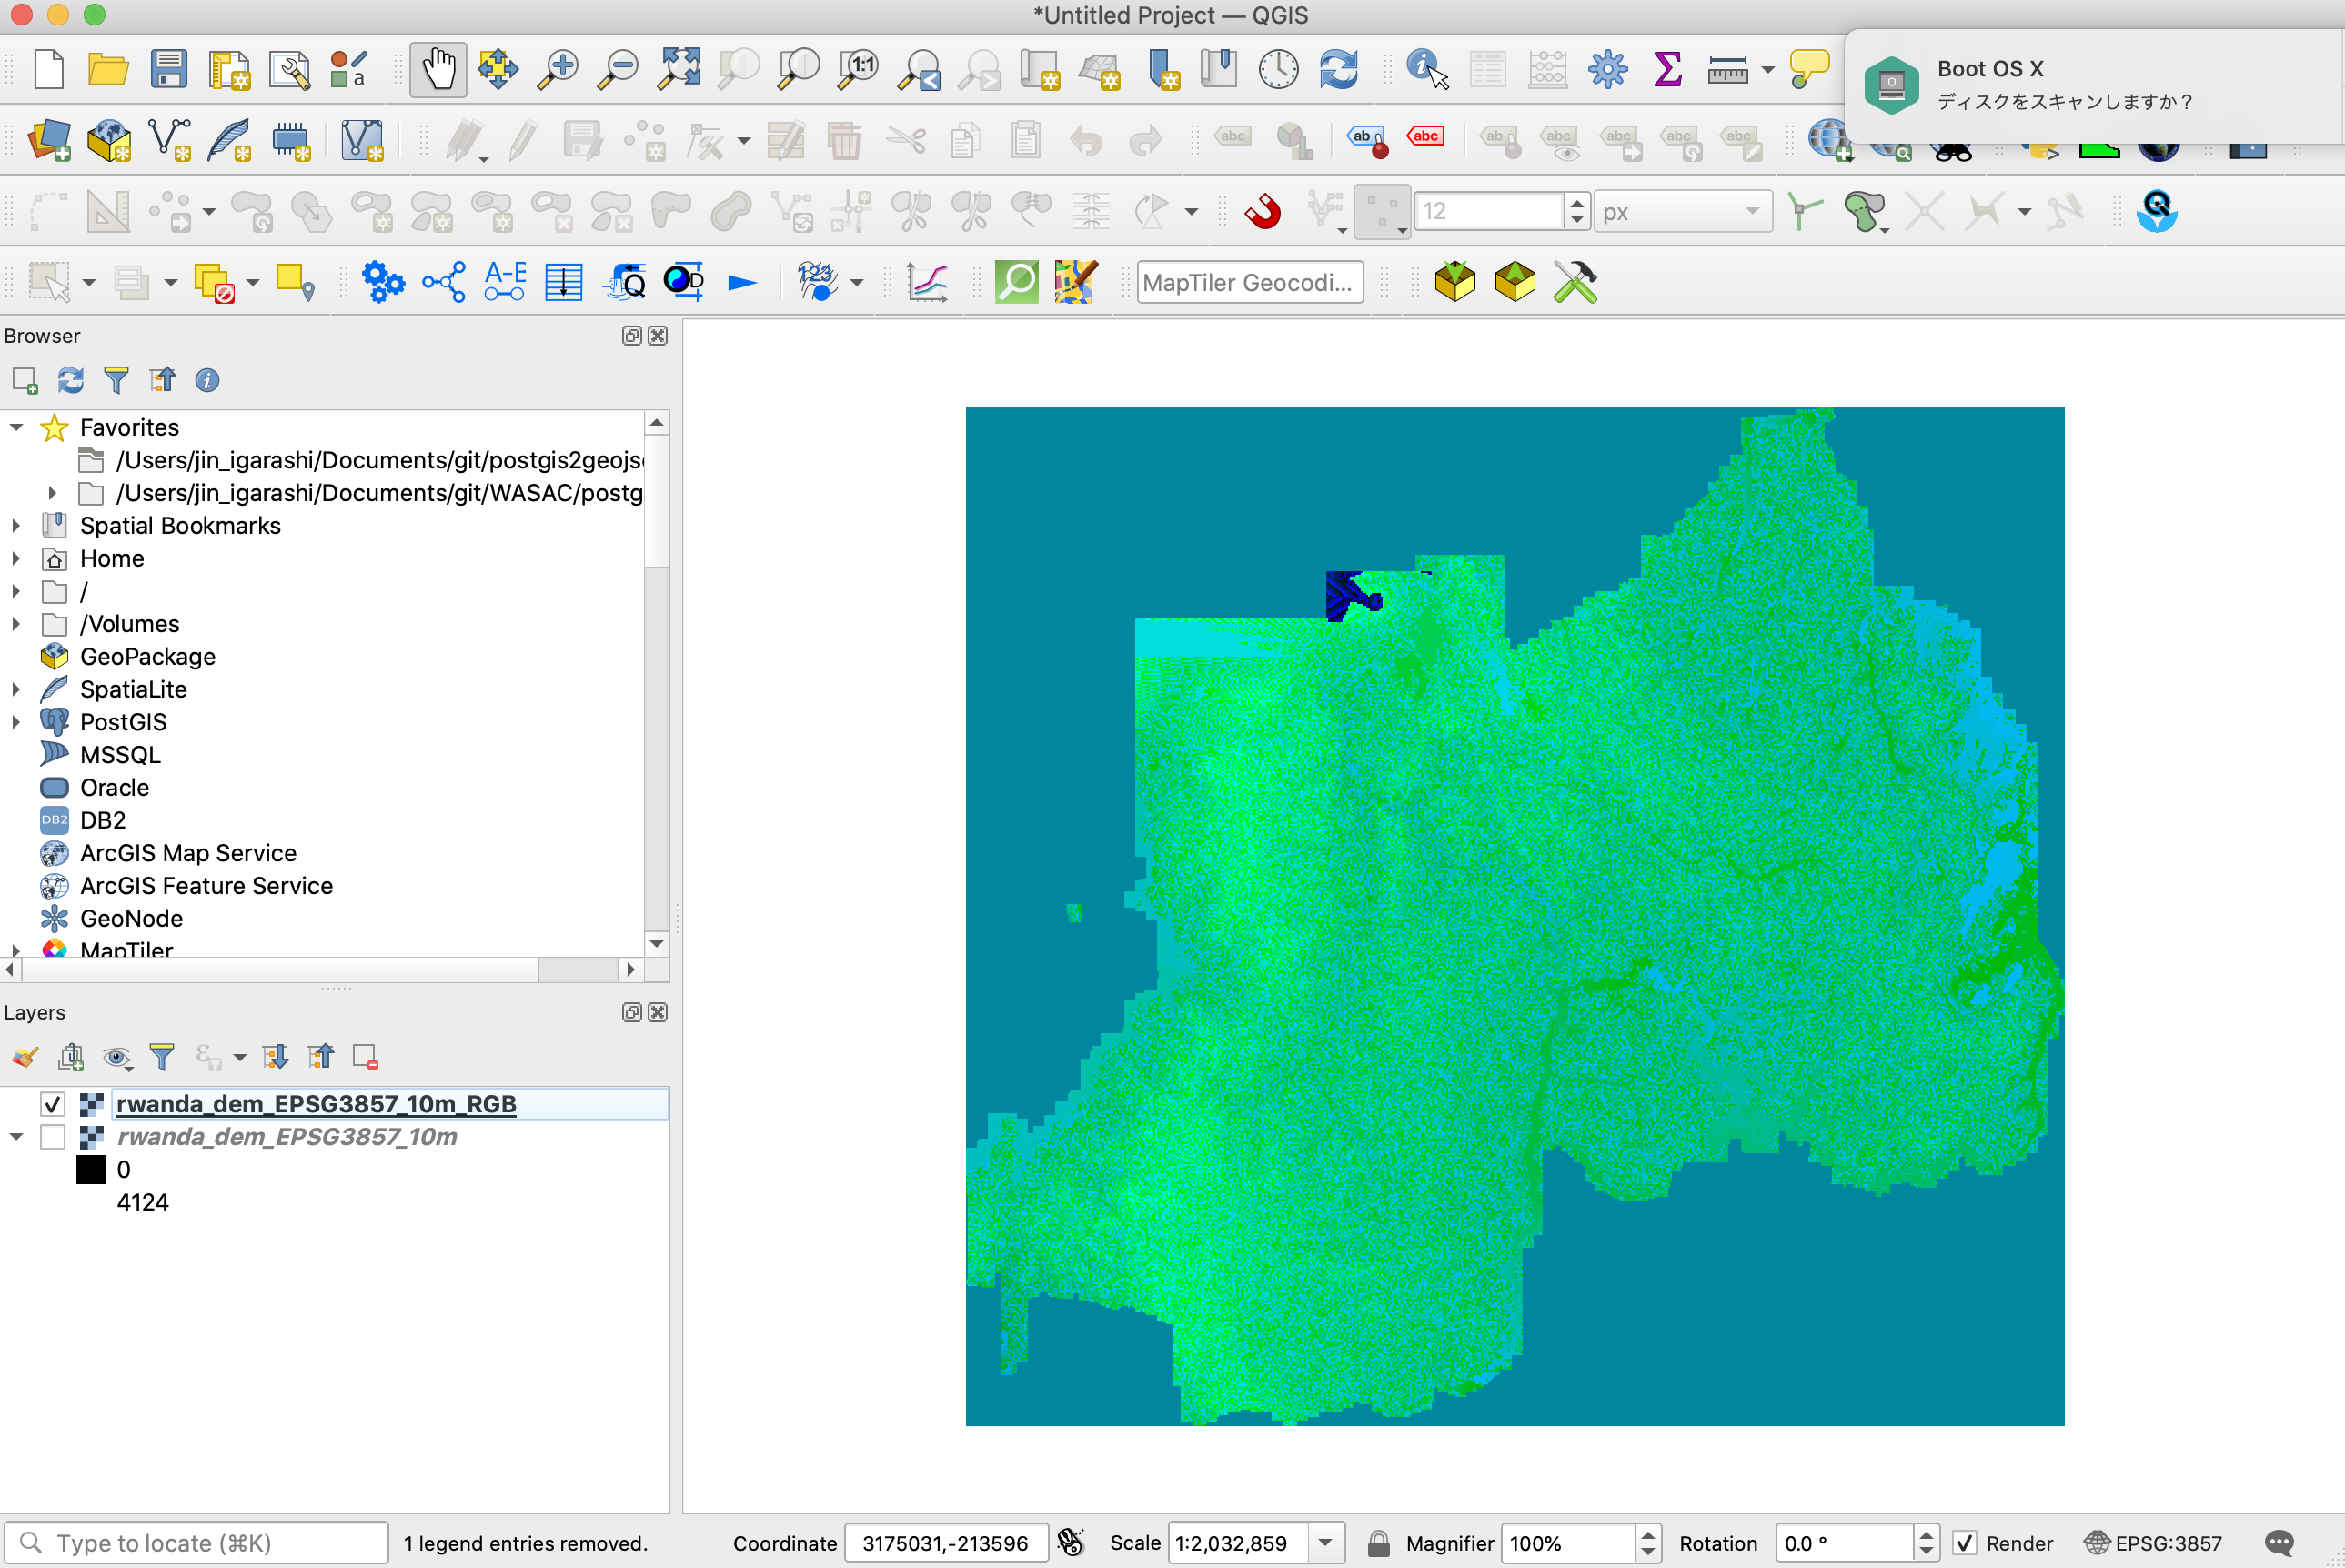
We can try to calcurate elevation by certain coordinates from bands values.
The formula used to calculate the elevation is
height = -10000 + ((R * 256 * 256 + G * 256 + B) * 0.1)
We can use gdallocationinfo to query band values by coordinates.
$ gdallocationinfo -wgs84 ./tmp/rwanda_dem_EPSG3857_10m_RGB.tif 29.7363 -2.2313
Report:
  Location: (8617P,13218L)
  Band 1:
    Value: 1
  Band 2:
    Value: 199
  Band 3:
    Value: 250
(rwanda_terrain)